How I Make IKEA PAX Wardrobes Look Built-In


Most of my clients want the same thing: a wardrobe that looks like it was built into the room by a joiner, without paying joiner's prices for it. IKEA PAX is how I get them there. It's solid, well made, and a fraction of the cost of building a carcass from scratch. Used properly, it gives me a solid base to build something that ends up looking bespoke and stylish, not flat-packed.
Properly is the key word there. PAX on its own is designed to stand in a room, not disappear into one. Getting from a standard frame to a wardrobe that looks like it grew out of the walls is a process, not a trick, and it's the same process on every job I take on, regardless of the room.
Here's exactly what I do, in order.
1. Fitting the frames square, level and plumb

Everything starts here. The PAX frames go in first, and they need to be genuinely square, level and plumb before anything else happens, working around whatever's already in the room: sockets, radiators, pipework, an awkward window reveal. Get this right and it saves me work later, less compensating with panels and scribing further down the line. Get it wrong and every step after fights you.
2. Building a supporting framework around the entire system
Once every frame is fitted, I build a framework around the whole PAX structure, not just around individual units. This does two things. It strengthens the PAX frames themselves and it gives me proper backing to fix the surrounding infill panels to later. Skip this step and infill panels have nothing solid behind them, which shows up eventually as flex, movement, or panels that don't sit flush no matter how well they were cut. You'll never see this bit once the wardrobe's finished. But it's the reason it stays solid for years instead of working loose in a few months.
3. Scribing the infill and end panels
This is where the built-in look actually happens. Surrounding infill panels and end panels are scribed, cut to follow the exact profile of the wall and ceiling rather than fitted as straight factory edges, closing every gap and concealing the PAX frame plinths underneath. In a period home, where a wall can move ten or twenty millimetres across a single alcove width, this step is not optional. It's the whole job.

Every panel is custom-cut from MDF, and while I'm shaping each one I profile the edges so the panel joints don't crack once they're painted. This matters more than it sounds. Get the profiling wrong and you'll see a hairline crack along that seam within months. That's usually the tell that a job was rushed at the fitting stage rather than the finishing stage.
4. Preparing every surface for paint
Before any paint goes on, every surface gets prepared properly: filling, sanding, and caulking every seam. This is the unglamorous middle step that most DIY attempts either skip or rush, and it's usually the difference between a finish that looks factory-smooth and one that shows every joint underneath the paint. I treat this stage as its own job, not a quick pass before the real work of painting starts.
5. Priming and painting
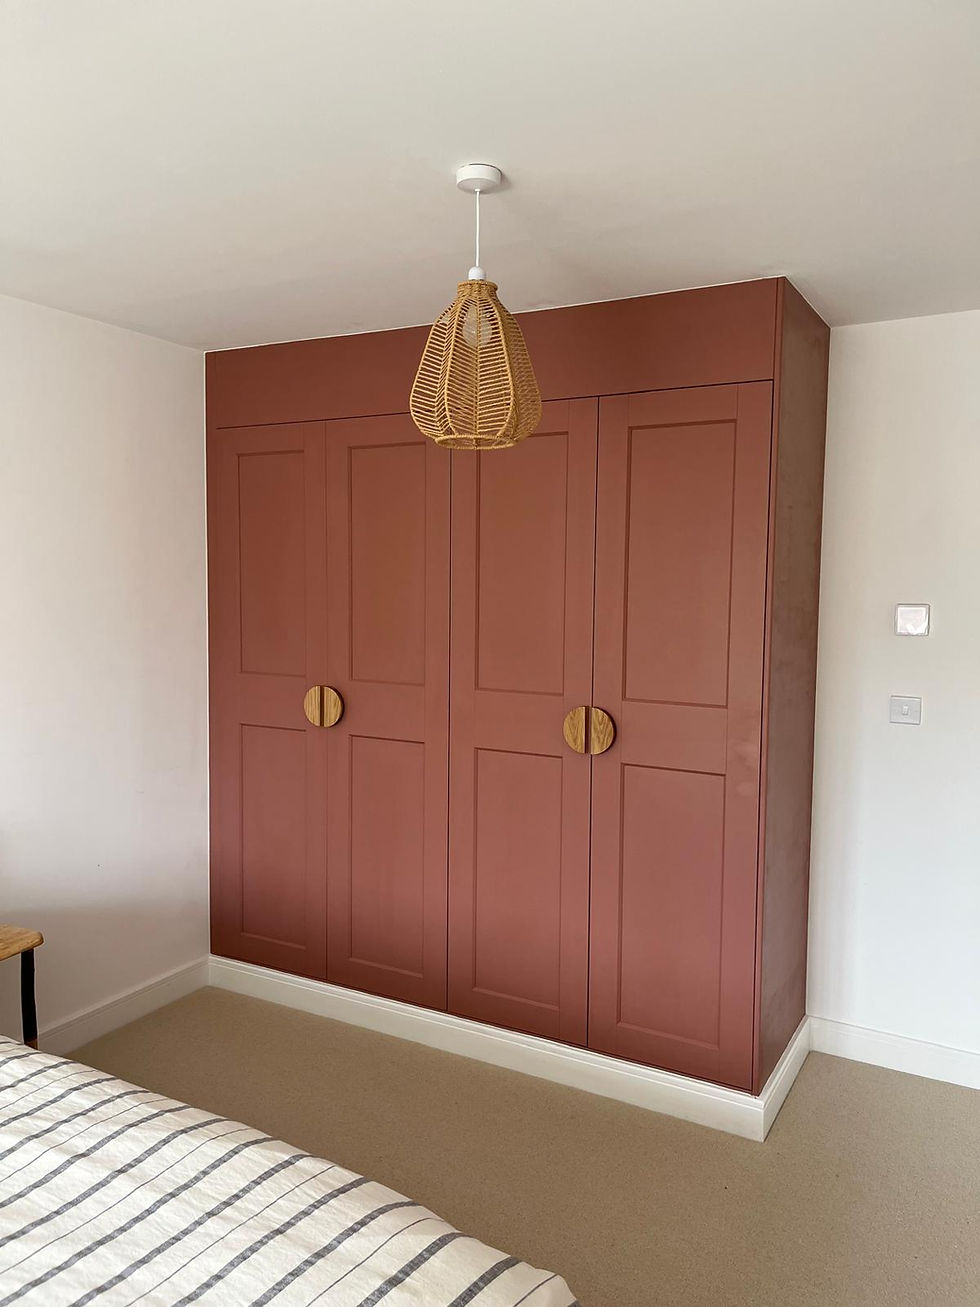
Surrounding wardrobe panels, skirting, and any custom MDF doors are painted as part of the final finish. IKEA doors themselves can either stay in their factory finish or be painted to match your chosen colour. If you'd rather arrange the painting independently, that's an option too, and I'll leave the wardrobe fully prepped and ready for whoever's doing it.
6. Clearing the site properly
Once the fitting, prep and painting work is done, I remove everything that isn't IKEA. To help with sorting the IKEA packaging itself, I separate cardboard out for recycling and plastic for general waste rather than leaving it all as one mixed pile for the client to deal with. It's a small thing.
But leaving a clean, empty room instead of a skip's worth of mixed packaging is part of what I mean by a proper finish.
The honest summary
None of this is beyond a competent DIYer with patience and the right tools. If I had to pick the two steps that actually separate built-in from fitted, it's 2 and 3. The framework gives everything something solid to sit on. The scribing closes every gap to the real shape of the room, not an assumed straight line. Skip either of those and you can still end up with a decent wardrobe. You won't end up with one that looks like it was always part of the house.
What you're paying for, if you hire it out, isn't information. It's someone who's done this enough times to get every one of those steps right on the first attempt, across a whole room, without an expensive mistake in the middle of it.
If you're based in Brighton or Sussex and you'd rather have a specialist handle it, get a fixed-price quote here. Most built-in PAX wardrobe installations start from £1,500 including IKEA units assembly, full built-in finish and painting. Every installation comes with a 12-month warranty.


